Tuesday, March 25, 2008
Monday, March 24, 2008
Design Thought Model
Concept:
The concept for the design thought model that I have to make for my design thinking class starts with a full scale model of my head, chest, and one arm made from clear acrylic. Inside the head where my brain would normally go will be a hopper full of marbles that represents ideas. A rotating disk powered by a steam engine will release the marbles at set intervals. The marbles will then roll down a twisting track where they will be processed, cleaned and filtered. The best marbles will eventually roll out of my hand and onto a piece of paper to form a design.
Style:
My style influences for this project are steampunk, nautilus, victorian, and clockwork. The materials will include acrylic, brass, velvet and dark stained wood.
Building:
I started by making plaster molds of my head, chest and arm.I have my brother cover my skin in plaster infused bandages.
We make a big mess and eventually get kicked outside.
After about 12 minuets I can take off the now solid bandages
I use more plater bandages to fit the front and the back of the head together. Then I poor plaster of paris in the hollow shell of my head to give it strength. I now have a solid 10lb plaster head which I can use to form the acrylic.
I put the acrylic sheet(plexiglass) in the oven at 300 degrees until I can easily bend it.
I then wear sox over my hands and press it against my plaster head. Here are some of the test pieces I made. I painted two of them so I could experiment will how I was going to get an aged brass look for the inside supports.
Sunday, March 23, 2008
The Ubnox-O-Phone!!!
I made this primitive synthesizer/obnoxious noise maker for fun during my spring break. I first got the idea when I saw all the crazy diy noisemakers and synths at musicfromouterspace.com. I used their Weird Sound Generator schematic along with the Ruby Guitar Amp schematic from runoffgroove.com to build what I have named the Ubnox-O-Phone. This was my first electronics project. I ordered most of my parts from mouser.com for about $35. I started by using the runoffgroove schematic to put together this simple amp on a bread board.
After I got the guitar amp making sounds, I finally had enough confidence to pull out the soldering iron and piece everything together.
For the case I decided to go with a rack mount kind of look. I also wanted to show off all my work so I used 1/8" clear acrylic and I left the sides open. I designed it in Illustrator and I used our school's laser cutter to cut out the front and back and all the holes for my knobs & stuff. I also used the laser cutter to engrave the name and control labels. I used a scifi looking font that turned out to be hard to read but still looked really cool.
It took me about 2 days to solder all the components together and then a few more hours to design and laser cut my faceplate. I was really happy with how it turned out. Here is a video that shows the noises it can make as well as some of the places I have taken it.
Wednesday, February 20, 2008
Monday, February 18, 2008
Laser Ants
Laser Ants Version 2.
Gold Leaf Alternative
Linoleum Prints Part II
I came up with a cool art deco pattern to cut into my second letter V.I've done tons of prints on all different types of surfaces.
Wonderfully Wiggly
I have registration issues...
Beast Mode Purple
Skateboard Building
In my Manufacturing Processes class we each get to make a skateboard deck!
We start with thin sheets of wood veneer.Then we cut the veneer into 7 rectangles that are each a little bit larger than the final dimensions of our skateboard.
Next we stack 7 layers together with the grain going long ways for sheets 1, 2, 4, 6 & 7, and short ways for sheet 3 & 5.
Working quickly, we use a brayer to apply glue between each layer.The glued veneer is then placed on a waxed MDF mold that Glenwood made earlier with the CNC.
The mold & veneer both go into a vacuum bag for about 4 hours.
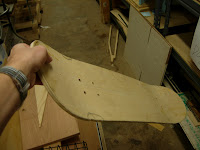
The rough skateboard comes out of the vacuum bag and is surprisingly strong!
We stack them together to continue drying.
We cut out the deck with a router and drill holes for the trucks.
Glenwood got us some nicer looking veneer for the graphics on the bottom.
These are the first round of ideas for the graphic on the bottom. I'm probably going to engrave the graphic with the laser cutter.