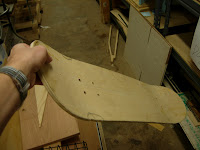
In my Manufacturing Processes class we each get to make a skateboard deck!
We start with thin sheets of wood veneer.
Next we stack 7 layers together with the grain going long ways for sheets 1, 2, 4, 6 & 7, and short ways for sheet 3 & 5.
Working quickly, we use a brayer to apply glue between each layer.


These are the first round of ideas for the graphic on the bottom. I'm probably going to engrave the graphic with the laser cutter.


Showing posts with label Halftone. Show all posts
Showing posts with label Halftone. Show all posts
Monday, February 18, 2008
Skateboard Building
Tags:
Ants,
Deck,
Glue,
Halftone,
Laminate,
Ply,
Revolutionary,
Ship,
Sk8,
Skateboard,
Vacuum,
Vacuum Bag,
Wood
Saturday, January 26, 2008
Modified Instructions
Tags:
Arrows,
Card,
Cartoon,
Custom Font,
Frames,
Game,
Halftone,
Instructions,
Modified,
Revision,
Revolutionary
Friday, January 25, 2008
Wednesday, January 23, 2008
Monday, January 21, 2008
Making Pictures into Cartoons
 I learned how to make my halftone style cartoons from pictures in photoshop from this tutorial. link
Tags:
Cartoon,
Halftone,
Revolutionary,
Tutorial
Saturday, January 19, 2008
Monday, December 25, 2006
Tuesday, October 10, 2006
Subscribe to:
Posts (Atom)


